
Setting up your provider account and organisation
Complete your business organisation set up
When you sign up as a provider, you are taken through a guided process of creating your organisation.
Step 1: Your Contact details
Select your name
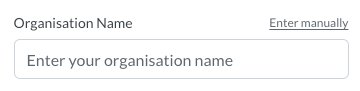
Start typing your business name in the Organisation Name field. This should find your business, and then populate your web site URL. It will also capture the ID which clients can use to leave reviews on Google.
Enter your web site
If your web site URL is not automatically populated, enter this so that people who are referred can click on the link in the referral to learn more about your service.
Setting up your phone number
Ideally you should verify a phone number for your organisation so that prospective clients have a contact number. This can also be used to immediately notify you of referrals. You will also get the opportunity to attach a phone number to your locations if you prefer.
Step 2: Selecting your type of organisation
All organisations are different, you could be a mobile massage provider, or a multi location fitness business or anything in between. Reco caters to all scenarios. Just select the type of business that matches your organisational structure. There is no difference in cost between these options. Cost only depends on how many providers you have who receive direct referrals, and you need at least one of these per location. You can also change your organisation structure after your account has been created, so if you are not sure, just select that you are a One Provider or Referrals Manager and you can add more providers and locations later.
Step 3: Selecting an Address
If you selected One Provider or Referrals Manager, you will have the option of selecting that you operate without a fixed location. This means that your address will not be displayed to clients or the people they refer. However, you still need to enter an address so that we know where you are so that Reco can work efficiently.
Use autocomplete to select an address or type it in manually. You can also add a location phone number which would also be displayed to clients or the people they refer so that they can get in touch and organise services with you.
Step 4: Describing your organisation (optional)
The better you describe your organisation, the better your prospective clients can understand your services and the benefits to them. A better description also gives our AI tool more information to work with when generating incentives that are appropriate for your business and your clients.
Describe your business
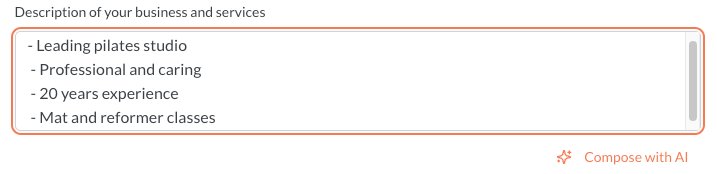
Your business description is shared with prospective clients, so it is important that it is well written and complete. Our AI can help. If you do not want to write the whole thing, just provide notes and press Compose with AI. If you like what it gives you, just click Use this. You can edit this further if you wish. Here is an example of providing notes. The more the better...
Add additional information
Select from the drop downs to classify your business and describe its size and how often your clients use you. This information is also helpful for our AI to develop appropriate incentives.
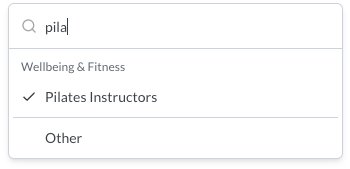
To select a business type, just start typing. If something appropriate does not appear, then select Other at the bottom, and describe your business.
Step 5: Selecting a plan and checking out
At the plan selection step, you select the number of subscriptions you need and choose the plan that works for your business.
You have three plans to choose from:
1. Pay as you go: No credit card required, and you only pay for referrals as they happen. If you just want to start slowly, and don't know how many referrals you will get.
2. Flex: A low monthly fee, which includes one free referral, plus a lower cost for referrals than the "Pay as you go" plan. Best for most business to get your referral program motoring.
3. Growth: The standard monthly fee, and a very low cost per referral. This is best for businesses that are rapidly growing through word of mouth.
Choosing the right plan: You can use the calculator on the plan selection page, to work out the best plan for you based on your likely number of referrals and conversion rate.
Changing plans: You can also check your plan whenever you like and unused subscriptions are credited to your account to use for referrals.
If you checkout using your credit card details, you can immediately set up an incentive and start receiving referrals from your clients, but you are not charged for 30 days.
Checking out gives you a 30 day free trial period. You don't pay anything for the subscription until 30 days after checkout, and can cancel anytime in between. You only pay the per-referral free every time you receive a validated referral.
Finalising Creating your Organisation
After signing up you will be given a walk-through of the key elements of the platform. We recommend following this walkthrough - it only takes 30 seconds. In summary, navigate to Menu > Organisation where you can manage:
- Organisation name — Check and finalise this
- Description and other data — Check and finalise this
- Logo — upload your logo, which will appear on referral cards and notifications to clients and people they refer
- External Review Sites — add the codes for your referral sites, so that when people leave reviews they can just copy-paste them to your preferred review channels. This is a huge opportunity that you can read more about here. Make sure they are enabled.
Make sure you save everything!
You can then start creating your locations, team or incentives. These steps are the subject of another article.
If you want to re-run the walk-through, you can reset it on your profile page accessed from the User Menu.